


Web analytics installation
Web analytics enables you to easily track and monitor many of the most important metrics for your website.
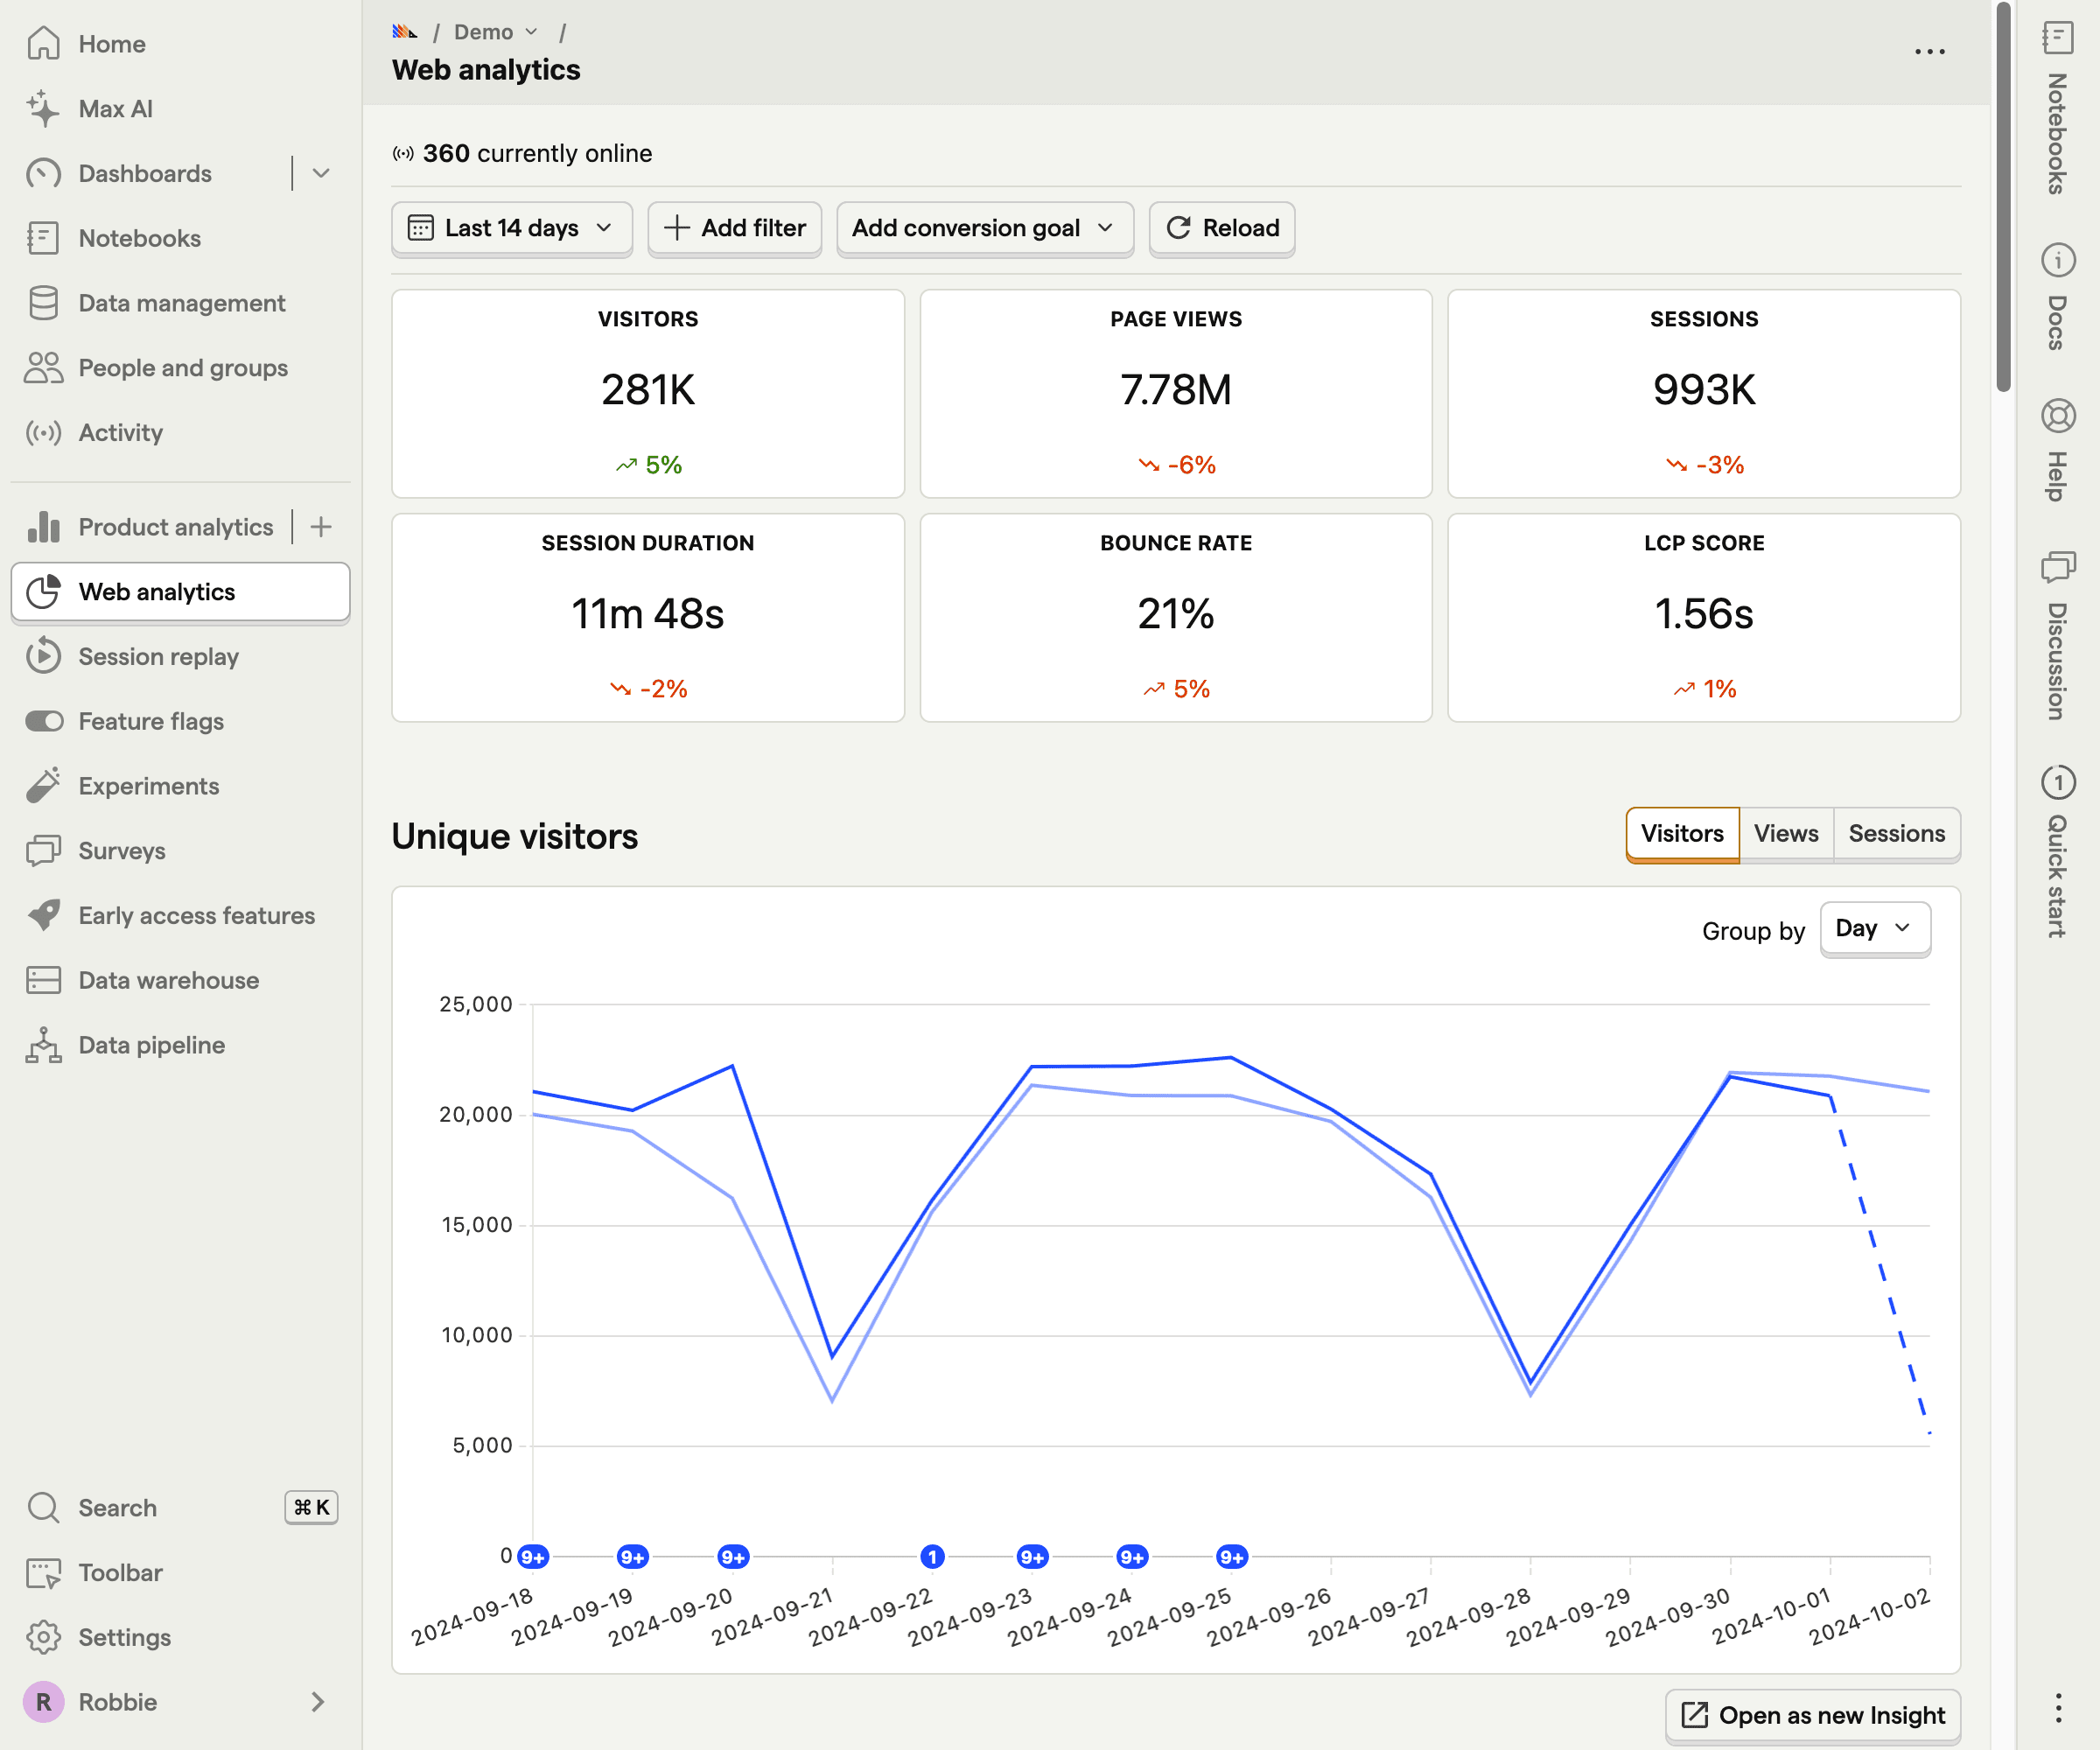
Unlike product analytics, web analytics offers a more streamlined and focused experience. This is especially useful for marketers, content creators, or anyone used to tools like Google Analytics. It includes a dashboard that offers essential metrics, such as visitors, views, sessions, session duration, bounce rate, conversions, paths, referrers, and more.
To get started with web analytics, install PostHog on the site or app you want to track.
Install PostHog in seconds with our wizard by running this command in your project directory with your terminal (it also works for LLM coding agents like Cursor and Bolt):
Wait for it to finish and test the setup once the wizard is complete.
The wizard supports React, Next.js, Svelte, and React Native. We've got more on the way.
Check out the wizard's GitHub repo for more details.
Set up a reverse proxy (recommended)
We recommend setting up a reverse proxy, so that events are less likely to be intercepted by tracking blockers.
We have our own managed reverse proxy service included in the platform packages, which routes through our infrastructure and makes setting up your proxy easy.
If you don't want to use our managed service then there are several other options for creating a reverse proxy, including using Cloudflare, AWS Cloudfront, and Vercel.
Grouping products in one project (recommended)
If you have multiple customer-facing products (e.g. a marketing website + mobile app + web app), it's best to install PostHog on them all and group them in one project.
This makes it possible to track users across their entire journey (e.g. from visiting your marketing website to signing up for your product), or how they use your product across multiple platforms.
Add IPs to Firewall/WAF allowlists (recommended)
For certain features like heatmaps, your Web Application Firewall (WAF) may be blocking PostHog’s requests to your site. Add these IP addresses to your WAF allowlist or rules to let PostHog access your site.
EU: 3.75.65.221, 18.197.246.42, 3.120.223.253
US: 44.205.89.55, 52.4.194.122, 44.208.188.173
These are public, stable IPs used by PostHog services (e.g., Celery tasks for snapshots).
After installing PostHog and ensuring autocapture is enabled, head to your web analytics dashboard to see your data. And then check out our getting started guide.
💡PostHog tip: Web analytics works with anonymous events. This means if you are primarily using PostHog for web analytics, it can be significantly cheaper for you.